When you think about preparing for a natural disaster, it’s easy to feel overwhelmed. The sheer number of “what ifs” can be paralyzing. But here’s the secret: preparedness isn’t about panic or trying to predict the future. It's about empowerment. It’s about building a solid foundation that gives you and your family control when everything else feels chaotic.
A good plan is your best defense against the unexpected. It transforms anxiety into action, starting with one simple question: what am I actually preparing for? A plan for a coastal town facing hurricanes looks completely different from one for a region prone to wildfires or tornadoes. Understanding those local risks is what makes your efforts practical, not just theoretical.
Identify Your Regional Risks
First things first: get to know your neighborhood’s threats. What’s most likely to happen where you live? Think beyond the big, dramatic events like earthquakes and floods. Consider the more frequent disruptions, too, like severe winter storms that can knock out power for days.
Speaking of which, power outages are one of the most common side effects of any major weather event. It’s worth taking some time to learn how to prepare for power outages to keep your family safe and your home functional.
The financial and physical toll of these events is very real and getting worse. From 1980 to today, the U.S. has been hit by 403 weather and climate disasters that each caused over a billion dollars in damage, with costs adjusted for inflation. That number, from a recent NOAA report, is a stark reminder of the escalating cost of being caught unprepared.
The Core Components of Preparedness
Once you’ve identified your primary risks, you can focus your energy where it counts. A comprehensive plan doesn’t have to be a hundred pages long. It just needs to cover a few fundamental areas.
- Emergency Kits: You need two distinct kits. One is a "Go-Bag" for those moments you have to evacuate immediately. The other is a "Stay-at-Home Kit" designed to help you shelter in place for several days without outside help.
- Family Communication Plan: If you get separated, how will you reach each other? Where is your designated meeting spot? Figuring this out now is the key to avoiding panic and confusion later.
- Document and Inventory Management: After a disaster, proving what you owned is critical for insurance claims and recovery. Protecting vital records and having a detailed home inventory is non-negotiable. This is where modern tools for asset and inventory management can turn a daunting task into a simple one.
- Home Fortification: This is all about making your property more resilient. Based on your risks, it could mean anything from strapping down your water heater for earthquakes to clearing flammable brush away from your home in a fire-prone area.
To help you get started, we've broken down the most critical first steps into a simple checklist. Tackling these four actions will put you miles ahead in your preparedness journey.
Essential Preparedness Checklist
| Action | Reason It Is Critical |
|---|---|
| Build a "Go-Bag" | Ensures you have immediate essentials (water, food, first aid) if you must evacuate quickly. |
| Create a "Stay-at-Home" Kit | Provides supplies to shelter in place for 72+ hours without power, water, or services. |
| Establish a Communication Plan | Guarantees family members know how to contact each other and where to meet if separated. |
| Digitize Important Documents | Protects vital records (ID, insurance, titles) needed for recovery and insurance claims. |
This table isn't just a to-do list; it's your roadmap to building a resilient household. Each action addresses a specific, high-stakes scenario, ensuring you're ready for the most likely challenges.
Preparedness is not a one-and-done project; it's a continuous process of learning, practicing, and updating your plan. The most important step you can take is the first one, turning your intention into tangible actions that protect what matters most.
Assembling Your Lifeline Emergency Kits
When a disaster hits and the power goes out, self-sufficiency isn't just a nice idea, it's your lifeline. The ability to get by for several days rests entirely on the prep work you do before you need it. At the heart of this strategy are two distinct emergency kits, each built for a different scenario.
First up is your "Go-Bag," the portable kit you grab for a fast evacuation. The second is your "Stay-at-Home Kit," a much larger stockpile of supplies that lets you shelter in place safely. Having both ready to go is non-negotiable.
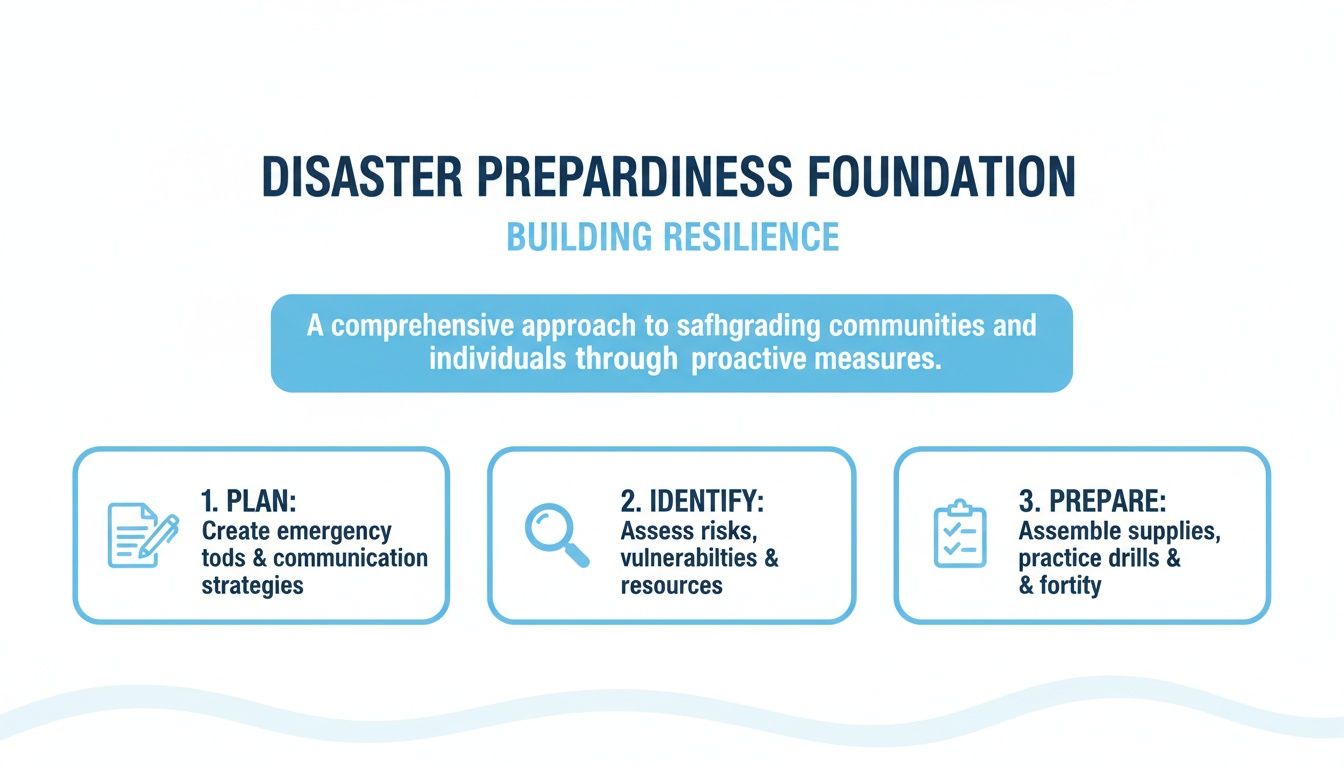
This diagram nails it: assembling your kits is the "prepare" step where all your planning becomes tangible. It’s how you turn a good idea into the actual resources that will see you through a crisis.
The Grab-and-Go Evacuation Bag
Think of your Go-Bag as your 72-hour survival pack. If an evacuation order comes, you might only have minutes to get out the door. This bag needs to be light enough to carry and stored somewhere you can grab it without thinking, like the front hall closet or the trunk of your car.
The mission here isn't comfort; it's survival. Every single item has to earn its place, whether it's keeping you hydrated or helping you call for help.
Here’s a checklist of the absolute must-haves for each person's Go-Bag:
- Water and Filtration: Plan for at least a three-day supply, which is about one gallon per person per day. A portable water filter or purification tablets are a crucial backup.
- Non-Perishable Food: You need high-energy, no-cook foods. Think protein bars, dried fruit, nuts, and jerky. Pack a three-day supply for everyone.
- First-Aid Kit: This should have the basics like bandages, antiseptic wipes, and pain relievers, but also blister treatments and any personal prescription meds (include a list of dosages).
- Communication Tools: A hand-crank or battery-powered radio is your link to emergency broadcasts when the internet is down. A fully charged power bank for your phone is just as vital.
- Light and Safety: A flashlight or headlamp with extra batteries is a must. Also, toss in a whistle to signal for help and a sturdy multi-tool.
Your Go-Bag isn’t a one-and-done project. It's a living kit. You have to check and rotate food, water, and medications every six to twelve months to make sure they’re still good when you actually need them.
You can take the guesswork out of tracking everything with a digital inventory. Our guide on creating an emergency grab and go inventory shows you how an app like Vorby can manage your supplies and even send you reminders about expiration dates.
The Shelter-in-Place Home Kit
If the official advice is to shelter in place, your home becomes your bunker. The Stay-at-Home Kit is a much bigger collection of supplies designed to keep your household going for up to two weeks with zero outside help.
Find a cool, dark, and easy-to-reach spot for this kit, like a basement, garage, or a dedicated closet.
It should contain everything in your Go-Bag, but scaled up significantly:
- Extended Water Supply: The goal is a two-week supply of water for everyone in the house.
- Canned and Dried Goods: Stock up on things that last forever, such as canned soups, veggies, and meats, plus staples like rice and pasta. And don't forget a non-electric can opener.
- Sanitation and Hygiene: This is critical for staying healthy. You'll need toilet paper, garbage bags, moist towelettes, and disinfectant. A small bucket with a tight lid can work as an emergency toilet if needed.
- Comfort and Safety: Pack blankets or sleeping bags, extra layers of clothing, a fire extinguisher, and waterproof matches or lighters.
For more ideas on what to include, it’s always smart to check expert sources. A great resource to cross-reference is your NZ emergency kit checklist for communication and survival gear.
Customizing Kits for Your Family
A generic checklist is a great place to start, but a truly useful kit is tailored to your family's actual needs. Walk through your day and think about what each person (and pet) truly relies on.
- For Infants: You’ll need formula, diapers, wipes, and bottles. Pack more than you think you need.
- For Seniors or Individuals with Disabilities: Add extra medications, backup mobility aids (like a foldable cane), and copies of important medical records.
- For Pets: They're family, too. Pack a small kit for them with food, water, medications, a leash, and a carrier or crate.
Building these kits is one of the most powerful things you can do to get ready for a natural disaster. It puts control back in your hands, giving you the tools you need to manage an otherwise chaotic situation.
Creating Your Family Emergency Plan
Your emergency kits are the tools for survival, but a well-rehearsed family plan is the instruction manual. Without a clear plan for how to act, where to go, and how to reconnect, even the best supplies can fall short in a moment of pure chaos.
Thinking through these scenarios now is one of the most important things you can do. The goal is to build muscle memory, so when stress is high and adrenaline is pumping, your family can operate on instinct instead of fear. A few simple decisions made today prevent panic and confusion tomorrow.
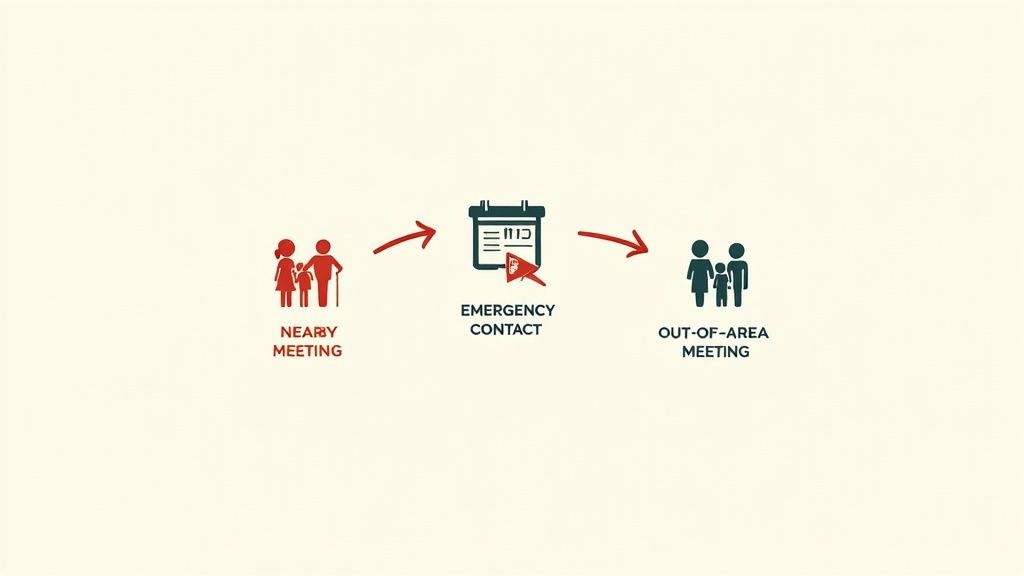
Establish Your Meeting Points
During a crisis, it’s almost a guarantee that your family will be scattered; some at work, some at school, others at home. Widespread communication outages are also incredibly common, which is why you have to decide ahead of time where you’ll meet up if you get separated.
You need two distinct locations:
- A Neighborhood Meeting Spot: This should be a specific, easy-to-spot landmark right near your home for sudden events like a house fire. Think the big oak tree at the end of the street or the sign at your local park entrance.
- An Out-of-Neighborhood Location: This is your rally point for larger disasters that force an evacuation, like a wildfire or flood. Choose a place like a relative’s house, a library, or a community center in a nearby town that’s unlikely to be hit by the same event.
Designate a Communication Hub
When local phone lines and cell towers are overloaded, getting a call through to someone across town can feel impossible. But long-distance calls often have a better chance of connecting. This is why having an out-of-state contact is a non-negotiable part of your plan.
This person becomes your family's information hub. After a disaster, each family member calls or texts this single contact to report they are safe. That contact can then relay messages to everyone else, keeping you connected when direct communication fails.
Choose someone reliable who lives far enough away that they won't be impacted by the same emergency. Make sure every single person in your family has their name, phone number, and email address saved in their phones and written down in their Go-Bags.
Plan for Different Scenarios
Your emergency plan needs to be flexible enough to cover the two most likely directives from authorities: evacuate or shelter in place. These aren't just vague concepts; they demand specific, pre-planned actions.
Mapping Your Evacuation Routes
If you're told to get out, you need to know exactly where you're going and how you'll get there, before you’re stuck in traffic.
- Identify Multiple Routes: Never rely on a single path. Map out at least two different ways to get out of your neighborhood and town.
- Account for Transportation: Decide how you’ll travel. If you have a car, make it a rule to keep the gas tank at least half full at all times. If you don't, figure out public transport options or make a plan with a neighbor.
- Know Your Destination: Your destination is that out-of-neighborhood meeting spot you already picked. Plan your routes to get there safely.
Defining Shelter-in-Place Procedures
Sometimes, the safest move is to stay exactly where you are. This requires a completely different set of preparations.
- Choose the Safest Room: Find an interior room on the lowest floor with no windows. This becomes your safe room for events like tornadoes or severe storms.
- Secure Your Home: Practice how to quickly shut off utilities like water, gas, and electricity. Know where the shutoff valves are and keep any necessary tools right next to them.
- Stay Informed: Keep your hand-crank radio in this room. It will let you listen for official updates without draining your phone battery, which will be a critical lifeline.
Turn Your Plan into a Habit
A plan that just lives on a piece of paper is nearly worthless in a real crisis. The final, and arguably most critical, step is practice. You don't need to run a high-stress simulation; the real goal is just to make the plan familiar.
Run simple drills twice a year. Walk together to your neighborhood meeting spot. Have a quick family meeting to review the out-of-state contact's info. This simple repetition is what transforms a document from a set of instructions into a life-saving habit.
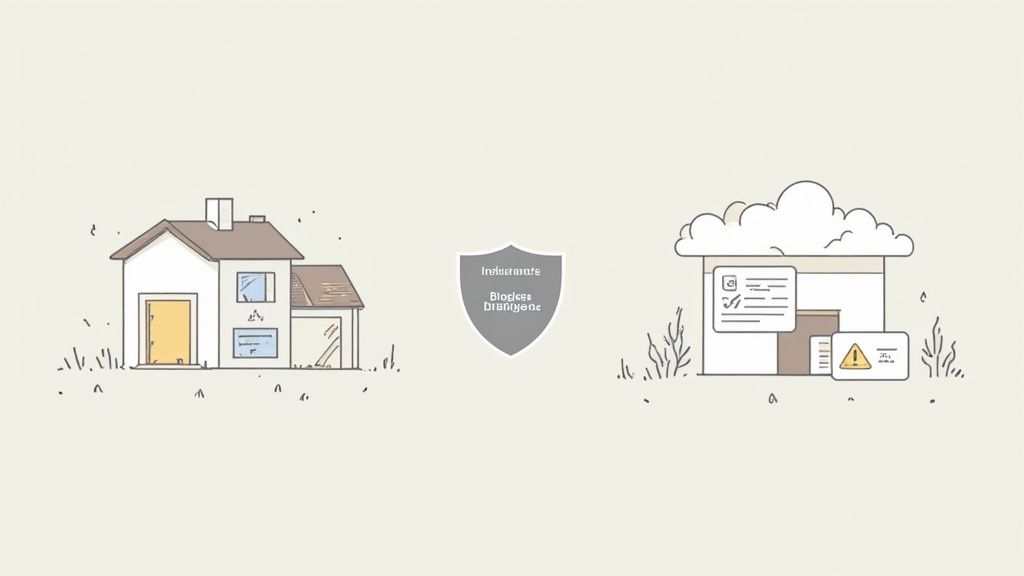
Securing Your Home and Vital Documents
Once you’ve mapped out a family plan and packed your kits, the next layer of preparedness is all about your physical space and financial footing. Your home is your shelter, and making it more resilient can dramatically lessen a disaster's punch. This means both fortifying the structure itself and protecting the critical documents that prove who you are and what you own, the very things you'll need to start rebuilding.
Making your home safer isn't always about massive, expensive renovations. More often, it’s about small, smart actions that are tailored to the real risks in your area. These proactive steps are a core part of learning how to prepare for natural disasters, turning your property from a potential weak point into a reliable shield.
Fortifying Your Property Against Local Risks
Every region has its own personality when it comes to disasters, so a one-size-fits-all approach to home protection just won’t cut it. Your strategy needs to be specific. Focus your time and energy on the dangers most likely to show up at your doorstep.
Someone in an earthquake zone, for instance, should be bolting heavy furniture, appliances, and water heaters to the walls. But if you're in a hurricane corridor, installing storm shutters or impact-resistant windows is a much more critical defense.
Here are some risk-specific moves you can make:
- For Wildfire Zones: Create a "defensible space" by clearing flammable stuff like dry leaves, pine needles, and overgrown vegetation from at least 30 feet around your home. Look into fire-resistant landscaping and make sure your vents are screened to block flying embers.
- For Floodplains: Get your critical utilities, like the furnace and electrical panel, moved to a higher floor if possible. It’s also a good idea to install check valves in your sewer traps to keep floodwater from backing up into your drains.
- For Tornado Alleys: Your garage door is often the weakest link during high winds, so look into reinforcing it. You should also have an interior, windowless room picked out to serve as a safe room for sheltering.
Protecting Your Financial Future with Insurance
Physical prep work is only half the equation; your financial resilience is just as crucial. The right insurance coverage is what bridges the gap between disaster and recovery, but far too many people find out they're underinsured when it's already too late. A standard homeowner's policy rarely covers events like floods or earthquakes, which require their own separate policies.
The financial stakes are massive. In the first half of a recent year, natural disasters caused $131 billion in global economic losses, with only $80 billion of that covered by insurance. That gap is precisely why you need to confirm your coverage is solid before you need it. You can see more about these financial impacts from CBS News.
Take an afternoon to pull out your insurance policies. Actually read them, and then call your agent to ask pointed questions like, "Am I covered if the creek down the street floods my basement?" or "What's my specific deductible for wind damage?" Knowing what your policy says is just as important as having one.
Digitizing and Safeguarding Important Documents
In the blur of an evacuation, physical documents are incredibly easy to lose or destroy. Think about it: birth certificates, social security cards, passports, property deeds, and insurance policies are nearly impossible to replace on the fly and are absolutely essential for getting aid and starting the recovery process.
The modern solution is simple but powerful: create a digital backup of every single vital record. This gives you access to your information from anywhere, even if the paper originals are gone for good.
Here’s a no-fuss way to build a secure digital archive:
- Gather Everything: Pull all your essential documents into one pile. This means personal IDs, financial records, property titles, medical info, and the works.
- Scan or Photograph: Use a scanner or just your smartphone to create clear, high-quality digital copies. Make sure the text is readable and you get every single page.
- Organize Digitally: Create a logical folder system on your computer. Naming files clearly (e.g., "Birth_Certificate_Jane_Doe.pdf") will save you a ton of stress later on.
- Back It Up (Twice!): Store your digital copies in multiple secure locations. A password-protected cloud service is a fantastic option, and so is an encrypted external hard drive that you can toss in your Go-Bag or keep in a safe deposit box.
Managing this digital library is where a tool like Vorby really shines. Instead of sifting through endless folders, you can upload documents and tag them directly to specific assets in your home, keeping your insurance policy, deed, and property photos all together in one searchable spot. For more tips on this, check out our guide on how to organize important documents at home.
Taking these steps to secure both your home and your records gives you a powerful sense of control, ensuring you’re ready to protect your family and rebuild with confidence.
Staying Informed and Keeping Your Plan Current
A disaster plan isn’t a trophy you create, mount on the wall, and admire. It’s a living, breathing strategy that needs regular attention to be worth the paper it’s printed on. Think of it less like a finished document and more like a garden; it needs tending to stay effective.
True readiness is an ongoing practice. It’s a cycle of staying informed, practicing your response, and updating your resources to reflect your family's current reality. This active maintenance is what turns a good idea into a reliable, life-saving habit. You’re building muscle memory so that when an emergency hits, your family acts with confidence, not panic.
Tuning Into Reliable Alerts
You can’t react to a threat you don’t see coming. In today’s world, having multiple ways to receive official emergency alerts is non-negotiable. Please, do not rely on a single source like social media, which is often a chaotic mess of slow, inaccurate information during a crisis.
Instead, build a layered system for getting warnings. The goal is to make sure that no matter what fails (the power, the internet, cell service) you can still get the official word.
- NOAA Weather Radio: This is the undisputed gold standard for a reason. Get a dedicated weather radio with a hand crank and battery backup. It will deliver alerts directly from the National Weather Service, even when everything else is down.
- Wireless Emergency Alerts (WEA): These are the automatic, text-like messages that pop up on your phone for extreme weather or AMBER Alerts. They use a different technology than normal texts, so they often get through when cell networks are jammed.
- Local Emergency Apps: Head to your city or county's emergency management website. Many now have their own apps that push out highly specific local warnings, evacuation notices, and shelter locations.
These tools are your early warning system, giving you the critical head start you need to either evacuate safely or shelter in place effectively.
The Power of Practice Drills
A plan is just a theory until you put it to the test. Running regular, low-stress drills is how you find the holes in your strategy and build the confidence your family needs to act under real pressure. This isn't about scaring anyone; it’s about making your response feel familiar and almost automatic.
A simple fire drill means everyone practices two ways out of each room and meets at your designated spot down the street. An evacuation drill can be as simple as having everyone grab their Go-Bags and get into the car while you time them. These small actions make a world of difference when adrenaline is pumping.
Practicing your plan is a form of risk reduction. The investment of a few hours a year helps hardwire a calm, effective response, turning chaos into a set of manageable steps for your family.
The financial logic here is staggering. Disaster costs now exceed $2.3 trillion globally each year when you account for all damages. Yet, targeted investments in risk reduction can deliver enormous returns. Consistent maintenance and drills are a core part of that strategy, turning a minor time commitment into significant protection. You can learn more by exploring the UNDRR's GAR report page.
Your Annual Preparedness Review
To keep your plan from getting stale, schedule a "preparedness day" once or twice a year. A perfect time to do this is when you change the clocks for daylight saving time, since you’re already changing batteries in your smoke detectors.
Use this simple checklist to guide your annual review:
- Refresh Your Kits: Check expiration dates on all food, water, and medications in both your Go-Bags and your Stay-at-Home Kit. Replace anything that's getting close to its use-by date.
- Update Your Plan: Have phone numbers changed? Have family needs shifted? Update your communication plan, emergency contacts, and any notes about kids, pets, or medical requirements.
- Check Your Documents: Make sure your digital and physical copies of important documents are current. If you bought a new car or got a new insurance policy, add the new paperwork to your files.
- Inspect Home Safety Features: Test your smoke and carbon monoxide detectors. Check the charge level on your fire extinguishers and quickly review how to shut off your home's main utilities (water, gas, electricity).
This disciplined approach is what readiness is all about, making sure your skills, knowledge, and supplies are always primed for whatever comes next.
Of course. Here is the rewritten section, following your specific guidelines and matching the provided expert, human-written style.
Your Disaster Prep Questions, Answered
Once you get past the big ideas of having a plan and a kit, the real-world questions start popping up. The practical details can feel overwhelming, but they don't have to be. Let's tackle some of the most common questions people ask when they start getting serious about being prepared.
How Much Water Do I Really Need to Store?
You’ve probably heard the old standby: one gallon of water per person, per day, for at least three days. Let’s be honest, that’s the bare minimum. Recent disasters have shown that power and water can be out for weeks, not days.
A much safer goal, if you have the room, is a two-week supply. This covers drinking, a bit of hygiene, and cooking. Don't forget to include your pets in this calculation! Also, anyone with special medical needs, who is pregnant, or lives in a hot climate will need more than the standard gallon. A smart approach is to buy commercially bottled water for long-term storage and supplement it with your own sanitized, food-grade containers.
What Are the Biggest Mistakes People Make?
Knowing what not to do is just as important as knowing what to do. A few common missteps can completely derail an otherwise solid preparedness plan.
- The "Set It and Forget It" Kit: This is the number one mistake. You build a great kit, shove it in a closet, and don't look at it for five years. By the time you need it, the food is expired, the batteries are corroded, and the bandages have lost their stick. Your kits need a check-up at least once a year.
- The One-Size-Fits-All Plan: A plan for a California earthquake looks very different from a hurricane plan in Florida or a blizzard plan in the Northeast. You have to prepare for the specific threats in your region. Generic advice is a starting point, not a complete strategy.
- Forgetting to Practice: A plan on paper is just a theory. When adrenaline is high and things are chaotic, you won't have time to read a checklist. Running a simple drill, like practicing your evacuation route, is what builds the muscle memory you'll rely on in a real emergency.
The most effective disaster preparedness isn't a one-and-done project; it's a habit. Small, consistent efforts to review, update, and practice your plan are what truly build resilience when it counts.
How Can I Prepare on a Tight Budget?
There’s a myth that getting prepared is expensive, and it stops too many people before they even start. You don't need to buy a high-end survival kit all at once. The key is to build your supplies slowly and steadily.
Every time you go to the grocery store, just add one or two extra items to your cart, an extra can of tuna, a gallon of water, a box of granola bars. You can find perfectly good flashlights, first-aid supplies, and batteries at dollar or discount stores.
And remember, the most critical parts of preparedness cost nothing at all. Making a family communication plan, identifying your evacuation routes, and talking through your strategy with your household are completely free. The most valuable investment isn't money, it's time.
How Should I Prepare for My Pets?
Your pets are family, and they need their own plan. In the chaos of an evacuation, you can't assume you'll have time to figure it out. Many emergency shelters don't accept animals, so you need a strategy ahead of time.
- Build a Pet Go-Bag: Pack a separate bag with at least three days of their food, water, and any medications they need. Toss in copies of their vaccination records, a current photo of you with your pet (for proof of ownership), and a favorite toy to help reduce stress.
- Check Their ID: Is your pet microchipped? Is the contact information on the chip registry up to date? This is absolutely critical. A simple collar with ID tags is a must-have backup.
- Plan Their Evacuation: Before a disaster hits, do a quick search for pet-friendly hotels or shelters along your evacuation routes. Keep a sturdy carrier for each pet and practice getting them inside calmly. The last thing you want is to be chasing a terrified cat around the house during an emergency. Never, ever leave your pets behind.
Tackling these common questions helps you move from theory to action, avoiding critical mistakes and making sure every member of your family, furry or not, is part of the plan.
When disaster strikes, proving what you owned is the first step to recovery. With Vorby, you can create a complete digital inventory of your home, storing photos, receipts, and important documents securely in the cloud. When it's time to file an insurance claim, you'll have everything you need right at your fingertips. Start your free trial and build a solid foundation for recovery today.