Imagine knowing exactly what you own and where it is in seconds. That's the real power of using barcode scanning for inventory management, a system that brings professional-grade organization right into your home. With a simple app, you can build a digital catalog of your belongings, making life a whole lot easier.
Why Bring Barcode Scanning Into Your Home
The idea of scanning items isn’t some futuristic concept; it’s a proven method that powers the entire global retail industry. In fact, barcode systems are so essential that over 90% of major retailers rely on them for everything from inventory to checkout.
The results speak for themselves. Businesses often see their error rates plummet by 70-80% after adopting barcode systems. It's a testament to the technology's simple power.
When you apply that same logic at home, you get similar benefits. You can transform chaotic spaces into streamlined systems. This is about more than just tidiness; it’s about regaining control and finding some peace of mind.
Solving Everyday Household Problems
Think about those little frustrations that add up. Ever bought a brand-new bag of flour, only to find three more hiding in the back of the pantry? Or spent a frantic half-hour tearing apart the garage for holiday decorations you know are in there somewhere?
A home inventory system tackles these problems head-on:
- Avoid Duplicate Purchases: By scanning pantry items as you use them up, you’ll always have a real-time list of what you need. No more wasteful double-buying.
- Locate Items Instantly: Tag those opaque storage bins with unique QR codes. A quick scan with an app like Vorby can pull up a complete list of everything inside without you ever having to open the lid.
- Streamline Insurance Claims: In the unfortunate event of a fire, flood, or theft, having a detailed, photo-documented inventory is absolutely invaluable for your insurance claim. It can make a stressful process much smoother.
Key Takeaway: A home barcode system is less about the fancy tech and more about the time, money, and mental energy you get back. It's a proactive approach to managing your home, not a reactive one.
Practical Scenarios for Home Inventory
The applications are endless and can be tailored to your lifestyle. A hobbyist can track their entire tool collection, knowing exactly which toolbox holds that one specific wrench they need. A family can manage pantry goods and even set up alerts for items nearing their expiration dates.
Even keeping track of electronics becomes a breeze. When you get a new TV, scan its barcode or create a QR code for it. You can then attach the digital receipt, the warranty information, and even a quick photo of the serial number, keeping all that critical data in one secure, easy-to-find place.
To really get the most out of your system, it helps to understand some general best practices for inventory management that businesses use. The core principles, including organization, tracking, and regular updates, are universal, whether you're managing a warehouse or just your kitchen. This guide will walk you through exactly how to apply these ideas in a practical, home-focused way.
Choosing the Right Tools for Your Home Inventory
Diving into a barcode-based inventory system doesn't mean you need a cart full of expensive gadgets. The most powerful tool you need is probably already in your pocket.
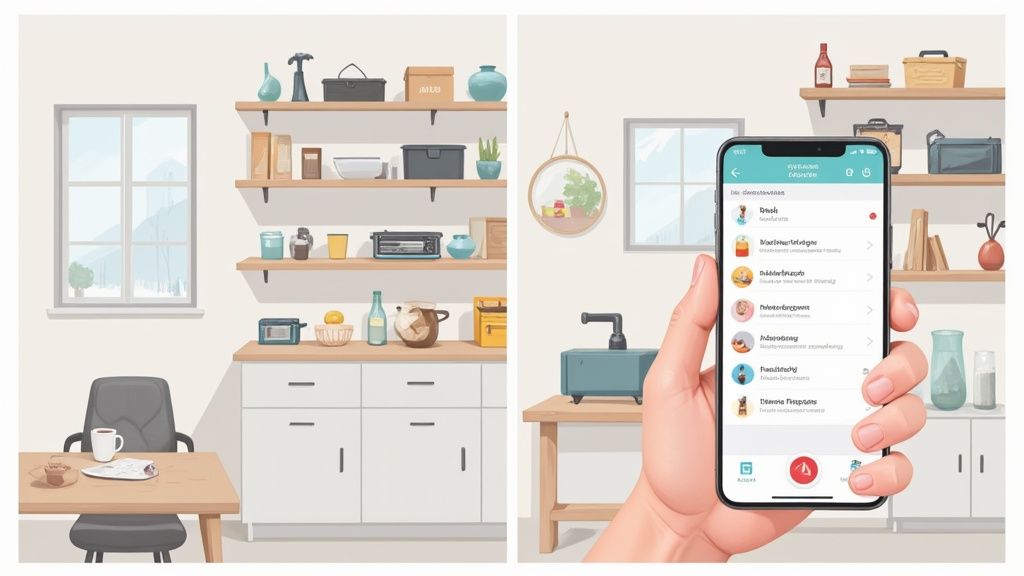
Your smartphone is the perfect starting point. It's more than capable of turning a complex organizational task into a simple, scannable process. The secret is pairing your phone with the right app. Modern inventory apps, like Vorby, are built to use your phone's camera as a high-performance barcode and QR code reader, instantly turning your device into the central hub for your entire home inventory.
Your Smartphone Versus a Dedicated Scanner
For the vast majority of home inventory projects, your smartphone is all you need. Its camera can easily read the manufacturer barcodes already on products or the custom QR codes you'll create for storage bins. The convenience is just unmatched. You can scan an item, snap a photo, add a few notes, and log its location, all from a single device that's always with you.
Now, if you're a serious collector cataloging thousands of items or you're managing a massive estate, then a dedicated handheld scanner might be worth a look. These devices are built for one purpose: scanning. They're often faster and can read codes from farther away than a phone. But for the average homeowner or renter, they're an unnecessary expense. Your phone is the cost-effective and highly capable choice.
Key Takeaway: Start with what you already have. A good inventory app on your smartphone provides all the scanning power you need for typical home organization. Only think about a dedicated scanner if you plan on scanning hundreds of items in a single session, and you plan on doing it regularly.
Deciding on Your Tagging System
Once you've got your scanner sorted (your phone!), the next step is figuring out how you’ll tag your belongings. Different items call for different methods, and the beauty of this approach is its flexibility. You can, and should, mix and match these options to create a system that truly works for you.
You've got three main choices for tagging:
- Existing Barcodes: This is the path of least resistance. Just use the Universal Product Code (UPC) already printed on retail items like food, electronics, and cleaning supplies.
- Custom QR Codes: Perfect for everything else, such as storage totes, furniture, handmade goods, or boxes of keepsakes. Apps like Vorby let you generate and print unique QR codes for anything without a barcode.
- NFC Tags: Near Field Communication (NFC) tags are small, programmable stickers or discs. A simple tap with your phone can instantly pull up an item's record, making them ideal for high-value items or things you access frequently where a visual code isn't practical or desired.
To help you decide, here’s a quick breakdown of how these three methods stack up against each other.
Comparing Home Inventory Scanning Methods
| Tag Type | Best For | Cost | Ease of Use | Information Capacity |
|---|---|---|---|---|
| Barcode | Retail products with existing UPCs | Free (already on item) | Very Easy | Low |
| QR Code | Storage bins, furniture, anything without a barcode | Low (cost of paper/labels) | Easy | High |
| NFC Tag | High-value or frequently used items | Moderate | Very Easy (just tap) | Medium |
Ultimately, the best system is a hybrid one. Use existing barcodes when you can, print QR codes for your storage bins and custom items, and maybe use a few NFC tags for specific things like your toolbox or emergency kit.
It's also interesting to see where this technology comes from. A lot of the innovation we can now use at home is driven by professional needs, like top-tier restaurant inventory management software, which can give you some advanced ideas for managing your own stuff.
This is a big market. The barcode scanner industry was valued at around USD 8.4 billion in 2025 and is projected to nearly double to USD 15.8 billion by 2035. That growth is mostly fueled by commercial sectors needing real-time tracking, but it's what makes the technology so powerful and accessible for us at home. You can see the full report on the barcode scanner market's growth on futuremarketinsights.com.
For a deeper dive into picking the right software to tie this all together, check out our guide on the best app for home inventory. By combining a powerful app with a smart tagging strategy, you can build a robust system that’s perfectly tailored to your home.
Building Your Digital Inventory From Scratch
Diving into a digital inventory system can feel like a huge project, but the secret isn't just to start scanning everything in sight. That's a recipe for a digital junk drawer. A little bit of planning upfront makes all the difference, transforming a random list of stuff into a powerful, searchable database of your home.
The goal is to build a logical framework from the very beginning. Getting this part right is the most important step in using barcode scanning for inventory management, and it pays off big time later.
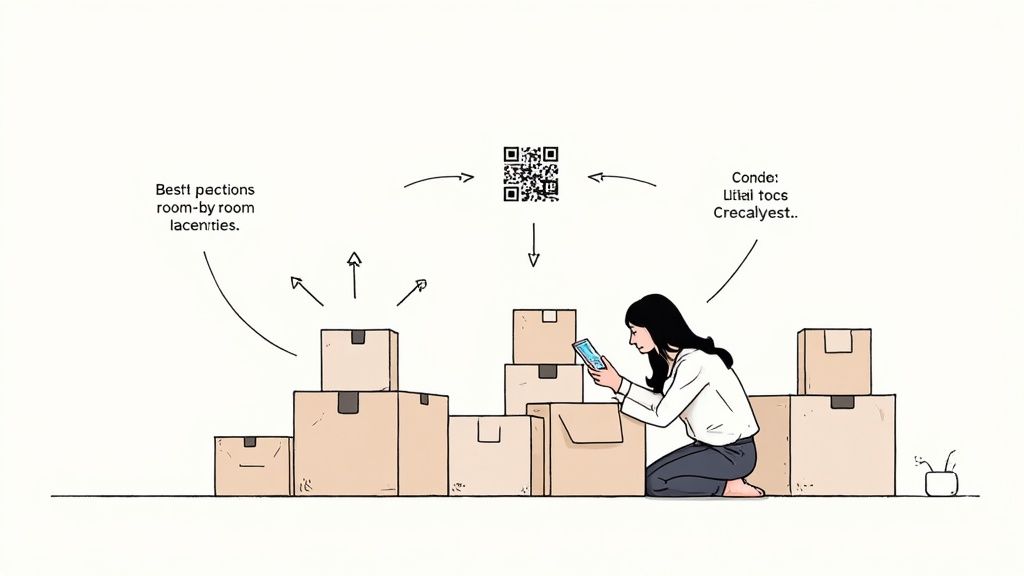
First things first, you need to map out your spaces. Before you even think about scanning a barcode, open up your app (like Vorby) and create your main locations. Be realistic about how your home is actually divided.
These aren't just room names; they're the specific zones where you actually stash your stuff. A good list might look something like this:
- Garage: Instead of just "Garage," break it down into 'Overhead Storage,' 'Tool Chest,' and 'Shelving Unit A.'
- Kitchen: Get specific with 'Pantry,' 'Under Sink Cabinet,' and 'Spice Drawer.'
- Master Closet: Differentiate between 'Top Shelf Bins' and 'Shoe Organizers.'
- Basement Storage Room: Pinpoint areas like 'Holiday Decorations Corner' and 'Camping Gear Tub.'
Why the detail? Because when you're frantically searching for your camping tent six months from now, knowing it's in the 'Basement Storage Room' is helpful, but knowing it's in the 'Camping Gear Tub' is a game-changer.
Structuring Your Categories
Once your locations are locked in, it’s time for categories. This adds a second, crucial layer of organization that lets you filter and sort your entire inventory in seconds. Categories define what an item is, no matter where it lives.
A well-structured digital inventory lets you find items by asking two simple questions: "What is it?" (Category) and "Where is it?" (Location). Getting this right from the start prevents a messy, unusable system later.
Think about the general types of items you own. Some solid starting categories usually include:
- Electronics
- Tools and Hardware
- Kitchenware
- Important Documents
- Sentimental Items
- Outdoor and Camping Gear
- Sporting Goods
This structure helps you see the big picture. For instance, you could pull up a list of all your 'Electronics' and their total value for an insurance quote in a snap, even if they're scattered across five different rooms. For those who really want to get granular with their setup, our guide on barcoding with Excel can give you some great ideas for building a robust system from the ground up.
Adding Your First Items The Right Way
Okay, you're all set. Time to start scanning. I always tell people to start with a few easy items that already have a barcode, like a box of cereal, a new power tool, or a book. This lets you get the hang of the workflow without much pressure.
When you scan an item with an app like Vorby, it often autopopulates the product name and a stock photo, which is a fantastic shortcut.
But don't just stop there. A raw scan is just data. To build an inventory that’s actually useful, you need to enrich each entry with the details that matter to you.
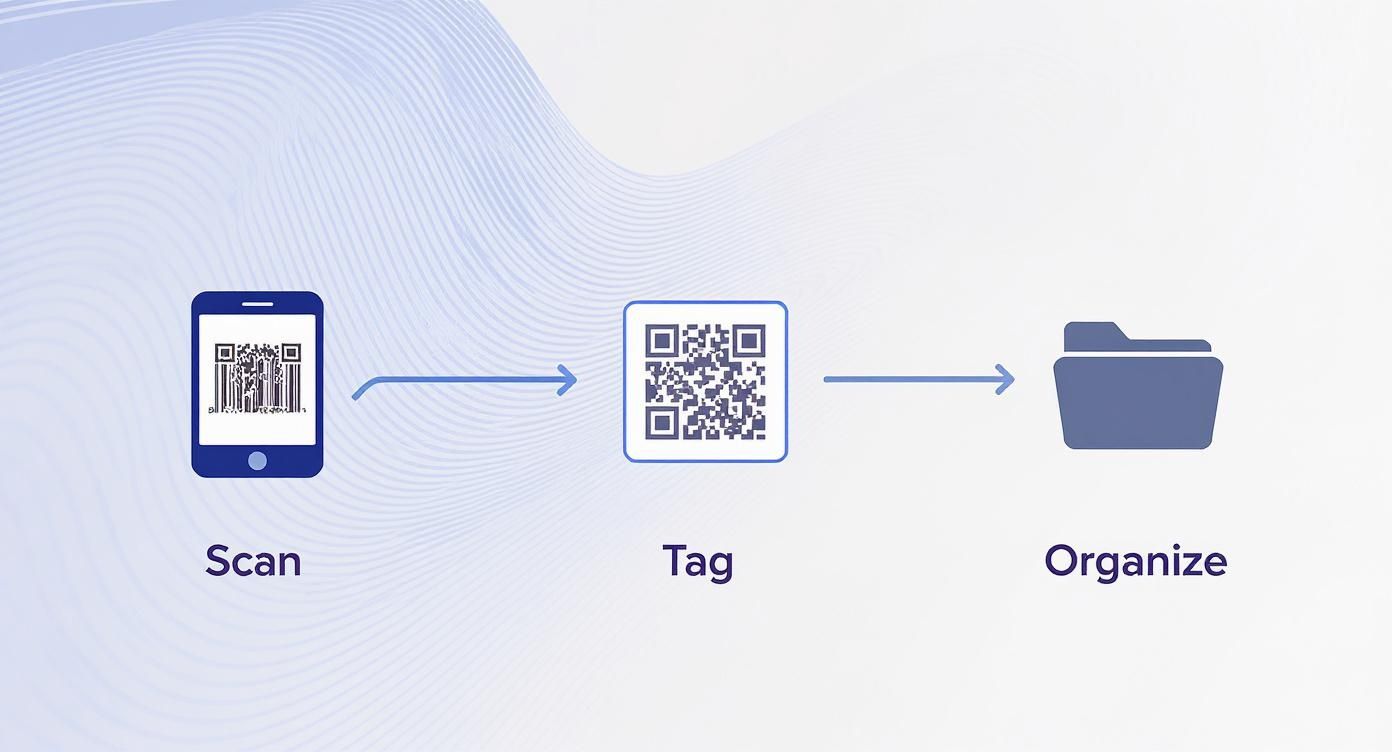
This workflow shows it perfectly: the physical scan is just the start. The real power comes from the digital organization that follows.
For every single item you add, make it a habit to flesh out the entry. It only takes an extra minute or two per item and saves you hours of headaches later.
- Assign Location and Category: Don't skip this! Immediately drop the item into the correct location and category you just created.
- Add High-Quality Photos: Snap a few pictures from different angles. This is non-negotiable for proving an item's condition if you ever need to make an insurance claim.
- Attach Digital Documents: Upload a quick photo or PDF of the receipt. This makes returns, warranty claims, and budget tracking a breeze. Add user manuals while you're at it.
- Include Key Notes: The notes field is your best friend. Jot down the warranty expiration date, the purchase price, or a quick reminder like, "Lent to John on 10/15."
Yes, this detailed approach takes more effort upfront than a quick scan-and-go. But this is what separates a simple list of stuff from a truly powerful home management tool. You’re building a system to save your future self from stress and disorganization.
Putting Your System to Work: Smart Tagging and Scanning Habits
You've got the hardware and software squared away. Now comes the part where the digital plan meets the real world. A successful barcode scanning for inventory management system isn't just about tech. It's about building consistent habits that make tracking your stuff second nature.
This is where the real magic happens. It’s about creating a simple rhythm that turns a chore into a seamless part of how you manage your home, ensuring your inventory stays accurate and useful for years to come.
Where You Stick the Tag Matters
It sounds trivial, but tag placement can be the difference between a quick, satisfying scan and a frustrating game of hide-and-seek. A poorly placed QR code on a box buried in a closet is practically useless.
Through plenty of trial and error, I've landed on a few best practices:
- Storage Bins: Always, always put the label on the front side of the bin, never the top. When you stack them (and you will), the top becomes invisible. The front face, however, is almost always accessible for a quick scan.
- Electronics: I like to place a small tag right next to the serial number on the back of the device. This keeps all the important identifying info in one spot.
- Tiny Items: For things too small for a label, like jewelry or small collectibles, create a "catalog card" with the QR code. You can keep these cards in a binder, almost like a photo album for your valuables.
My single best piece of advice? Work in batches. Don't try to inventory your entire home in one marathon weekend because you'll burn out. Instead, tackle one small, defined area at a time. Do the pantry. Do one bookshelf. The small wins keep you motivated.
Be Ruthless: Not Everything Needs a Tag
One of the biggest mistakes I see people make is trying to inventory everything. The goal isn't to create a log of every fork and sock you own. It's about tracking items that are valuable, hard to replace, or frequently misplaced.
So, how do you decide what's worthy of a tag?
- High-Value Gear: Anything you'd list on an insurance claim gets a tag first. Think electronics, power tools, expensive furniture, or collectibles.
- Mystery Boxes: If you can't see what's inside a container, it’s a perfect candidate for a QR code. This is a game-changer for seasonal decorations, keepsakes, and camping gear.
- Loaned-Out Items: Are you the friend who's always lending out tools, books, or video games? A quick scan in your inventory app is the easiest way to remember who has what.
- Things That Expire: Tracking pantry goods or first-aid supplies can save you money and reduce waste by helping you use things before they go bad.
By being selective, you focus your effort where it delivers the most bang for your buck. For a deeper dive into this, check out our guide on building a home tagging system for inventory.
Keeping Your Scans Accurate
Even at home, scanning errors can creep in. In the commercial world, over 70% of warehouses rely on barcode scanning because it's simple and fast. While these professional systems hit around 99% accuracy, human error is always a factor. We can learn from them to keep our home systems just as sharp.
Here are a few tips I've picked up to keep scans clean and data reliable:
- Let There Be Light: Your smartphone camera needs decent light to focus on a QR code. If you’re in a dim attic or creepy basement, just pop on your phone's flashlight.
- Fix Damaged Labels: A label that gets smudged, torn, or wrinkled can become unreadable. Don't panic. Apps like Vorby let you easily reprint a QR code for an existing item. Swap out damaged labels as soon as you spot them.
- Ditch the Glare: Shiny, laminated labels look slick, but they can create a glare that blinds your phone's camera. I almost always opt for matte-finish labels for this reason.
- Hold Steady: Give your phone a second to focus before you pull it away. A steady hand ensures a clean capture, especially with smaller or more detailed codes.
Once you've got your basic inventory built out and you're in the rhythm of scanning, it's time to dig into the features that really elevate your system. This is where you move beyond a simple list of stuff and create a dynamic home management tool that actively works for you.
Think of these advanced capabilities as the difference between a static spreadsheet and an intelligent assistant like Vorby. They're designed to automate reminders, prepare you for the unexpected, and let you shape the system to fit your life perfectly. This is where your inventory starts saving you from future headaches.
Set Up Automated Alerts and Reminders
This is easily one of the most powerful features you can use. Setting up automated alerts is a game-changer for anything with an expiration date or an important deadline. It’s a proactive way to prevent waste and those last-minute panic moments we all know too well.
You can set up notifications for all sorts of things:
- Food Expiration Dates: Scan your pantry items as you put them away and plug in their expiration dates. Vorby can then ping you a week before your canned goods or spices are about to expire, so you can make sure to use them up.
- Warranty Deadlines: Just bought a new TV or washing machine? Log its warranty expiration date. Set a reminder to go off a month before it ends, giving you plenty of time to address any issues while you're still covered.
- Subscription Renewals: This isn't just for physical stuff. Create an entry for that software subscription or annual membership and set an alert so you're never caught off guard by a renewal charge again.
With this one function, your inventory stops being a passive list and becomes an active assistant, helping you manage the lifecycle of everything in your home.
Generate Reports for Insurance and Planning
In an emergency, a well-documented inventory is your best friend. If you ever have to deal with a fire, flood, or theft, handing your insurance company a detailed report of your possessions can make a painful process significantly faster and simpler.
Modern inventory apps make generating these reports dead simple. With just a few clicks, you can create a comprehensive PDF or CSV file that includes everything an adjuster needs:
- Item names and detailed descriptions
- High-quality photos showing their condition
- Purchase dates and prices
- Scanned copies of your receipts
- Serial numbers for high-value electronics and valuables
Critical Takeaway: Don't wait until you need it. Make a habit of generating a full inventory report every six months. Save a copy to a cloud service like Google Drive or Dropbox so you can access it from anywhere, even if your phone and computer are gone.
Use Custom Fields for Ultimate Personalization
Standard fields like "name," "price," and "location" are the bread and butter of any inventory system. But custom fields are where you can truly make the system your own. This feature lets you add your own unique data points to track whatever matters most to you.
The possibilities here are endless, and they often revolve around your hobbies and lifestyle. For example, a book collector could add custom fields for "Author," "Genre," and "Lent To." Someone who collects vintage stereo equipment might want to track "Manufacture Year" and "Condition Grade."
Here are a few practical ideas to get you started:
- Electronics: Add a dedicated field for "Serial Number."
- Clothing: Track "Size" and "Season" to make closet swaps easier.
- Tools: Create a field for "Lent To" or maybe "Last Sharpened."
- Wine Collection: Use fields for "Vintage," "Region," and "Drink By" date.
By personalizing your data with custom fields, you build a system that reflects what you actually care about. It makes your inventory infinitely more useful and searchable for the way you live your life.
Got Questions About Home Inventory Scanning?
When you first start scanning barcodes and QR codes to inventory your home, you're bound to have a few questions. That's totally normal. Getting these initial hurdles out of the way will make the whole process feel less like a chore and more like a superpower.
Here are the most common questions we get, with real-world answers to get you started.
What Do I Do If an Item Has No Barcode?
This is the first wall everyone hits. You go to log a storage bin, a custom piece of furniture, or that antique vase from your grandmother, and there's no barcode. What now?
The fix is surprisingly simple: you make your own. Modern inventory apps like Vorby have a built-in QR code generator. In seconds, you can create a unique digital tag for literally any item. Just print it on an adhesive label, stick it on, and you're done. Now when you scan that custom code, it instantly pulls up the item's entry, complete with all your photos and notes. This is the secret to cataloging everything you own, not just what you buy at the store.
Is My Smartphone Good Enough, or Do I Need a Dedicated Scanner?
Let me settle this one for you: for home inventory, your smartphone isn't just "good enough," it's the perfect tool for the job. The cameras in today's phones are fantastic at reading barcodes and QR codes quickly. Plus, the entire app experience is designed for your phone.
Dedicated handheld scanners are built for warehouses where someone scans thousands of items per shift. That's serious overkill for your garage or kitchen pantry. Stick with the powerful device that's already in your pocket. It’s your scanner, camera, and database all in one.
Key Insight: Your smartphone is the all-in-one hub for your inventory. It scans the items, takes the photos, adds the notes, and lets you browse your entire collection. There's almost never a reason to buy another piece of hardware.
How Can I Be Sure My Inventory Data Is Private and Secure?
Trusting an app with a list of your personal belongings is a big deal, and you absolutely should prioritize security. Protecting your information comes down to a few key practices that are easy to follow.
First, only use a reputable app that's upfront about its privacy policy and uses strong security like cloud encryption. This keeps your data safe on your device and when it’s synced. After that, it’s about good personal security habits:
- Use a strong, unique password for your inventory account. Don't reuse your email password!
- Turn on two-factor authentication (2FA) if the app offers it. This is a non-negotiable layer of security.
- Back up your data regularly. Most good apps let you export your inventory as a PDF or CSV file. Save that backup to a secure cloud drive or an external hard drive. It's your ultimate safety net.
How Long Does It Realistically Take to Inventory an Entire House?
This is a classic "how long is a piece of string?" question. It really depends on the size of your home and how much stuff you have. But I can give you the single most important piece of advice on this topic: do not try to do it all at once.
Seriously. Attempting to inventory your entire home in one weekend is the fastest path to burnout and an abandoned project.
A much better approach is to break it down. Tackle one small, manageable area at a time. Spend an hour on a Saturday morning doing the kitchen pantry. The next weekend, do the bookshelf in your office. Maybe the tool chest in the garage the week after that. By turning a massive project into a series of small wins, you'll make steady progress without feeling overwhelmed. For an average home, this might take a few weekends, but the peace of mind you'll get is worth every minute.
Ready to stop wondering where things are and start knowing? Vorby gives you all the tools you need, from QR code generation to powerful search and multi-user sync. It’s time to take control.