The best way to label storage bins isn't about the label maker itself, but the system you create before you ever print a single sticker. This is the foundational step, the part where you decide how you'll actually describe your items so you can find them later.
A great naming convention is the real secret to turning a mountain of mysterious boxes into a searchable, stress-free inventory.
Laying the Groundwork for a Lasting System
Before you get caught up in the fun of printing perfect labels, let's talk strategy. A disorganized labeling approach, even with the best supplies, will just create prettier confusion down the road. The goal here is to establish a clear, logical hierarchy that anyone in your house can understand with a quick glance.
This all comes down to creating consistent naming conventions that work for your brain. Think about how you naturally search for things. Do you think, "Where are the Christmas decorations?" or "What's in that bin on the top shelf of the garage?" Your answer is the key to the best strategy for you.
Choosing Your Naming Convention
There are two main ways to think about naming your bins, and each one solves a different problem. The trick is to pick one style and stick with it for similar types of items to avoid chaos.
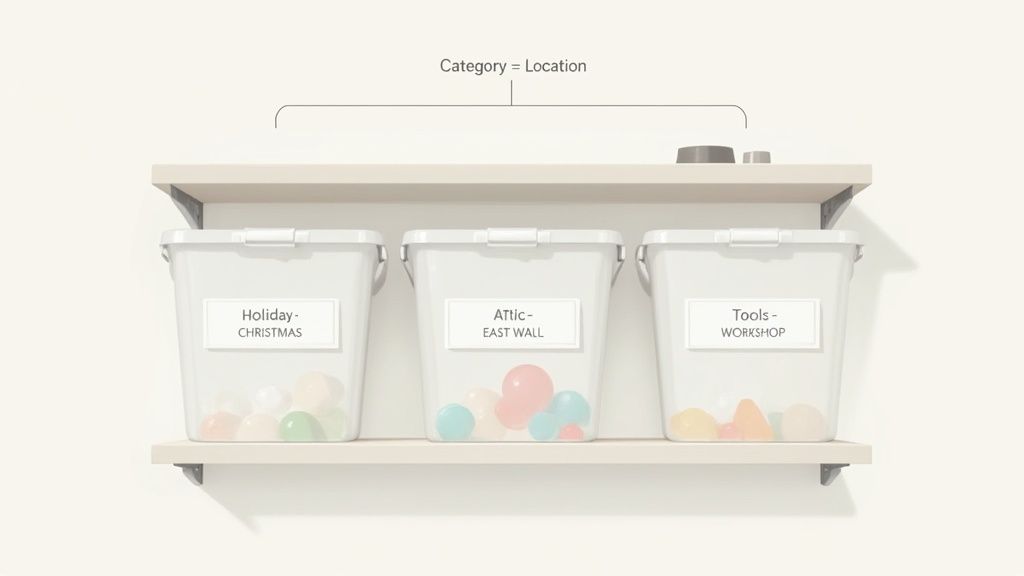
- Category-Based Naming: This is the most popular and intuitive method. You label bins based on what’s inside, grouping like with like. This system is perfect for things you search for by type, like tools, holiday decor, or kids' clothes.
- Location-Based Naming: This strategy is a lifesaver for items you rarely touch or for generic storage areas where the contents might change over time. It’s a simple way to create a map of a large space like a basement or attic.
For example, a category label might read "Holiday - Christmas Ornaments," while a location label could be as simple as "Attic - Back Left Corner." You can even get more powerful by combining them: "Garage Shelf A - Gardening Supplies." If you're looking for more inspiration, exploring different storage container organization ideas can spark some great ways to structure your own system.
The most effective labeling system is one that reflects how your brain works. Don’t force a complicated system if a simple one does the job; consistency is always more important than complexity.
Quick Guide to Naming Your Bins
Not sure which method to use? This table breaks it down based on how you search for your stuff.
| Naming Method | Best For | Example | Pro Tip |
|---|---|---|---|
| Category-Based | Frequently used items or things you search for by type. | "Kitchen - Small Appliances" or "Crafts - Yarn" | Use sub-categories for clarity (e.g., Holiday > Halloween > Costumes). |
| Location-Based | Rarely accessed items or generic storage zones. | "Basement - Shelf 3B" or "Garage - Overhead Rack 1" | Use a simple grid system (A1, A2, B1, B2) for large shelf units. |
| Hybrid (Category + Location) | Organizing a large space with many different types of items. | "Workshop Shelf A - Power Tools" | Use the location as the primary identifier and the category as the secondary. |
Ultimately, the best method is the one you'll actually use. Keep it simple and logical.
Real-World Examples in Action
Let’s see how this looks in a real home. For anything seasonal, a category-first approach is almost always the winner. A bin labeled "Holiday - Halloween Costumes - Kids" is infinitely more useful than "Basement Bin #7." You instantly know what's inside without having to cross-reference a master list.
In a workshop or garage, a hybrid model often works best. You can assign broader categories like "Power Tools" or "Painting Supplies" to specific shelves. From there, individual bins can get more granular labels like "Drill Bits & Drivers" or "Sandpaper - Mixed Grits." This creates a clear, scalable system that can grow with your collection.
And for those sentimental items that often get stored together, a simple but descriptive approach like "Keepsakes - Childhood Photos & Art" works perfectly. By establishing this solid foundation first, you're setting yourself up for a truly functional organization system that lasts.
Choosing Label Materials That Actually Last
A perfectly organized system crumbles the moment your labels peel, fade, or turn into an illegible smudge. Choosing the right physical materials isn’t just a detail; it’s the foundation of a system that works long-term.
The wrong choice means you’ll be redoing all your hard work in a year. The right one ensures your system survives the brutal realities of heat, humidity, and time.
The most common mistake I see is people grabbing standard paper labels for a bin destined for the garage or basement. Paper is incredibly vulnerable to moisture and temperature swings, which causes it to yellow, bubble, and eventually fall right off. For environments with any hint of humidity or temperature fluctuation, you need to think tougher.
Paper vs. Synthetics: The Durability Showdown
Synthetic materials like vinyl and polyester are the undisputed champions of durable labeling.
Vinyl offers fantastic flexibility and resistance to moisture and chemicals, making it a great all-around choice for garages and basements. Polyester, on the other hand, is even more robust. It can withstand extreme temperatures (both hot and cold) and abrasion, which is ideal for bins you store in a sweltering attic or an exposed outdoor shed.
For items you know will be handled or moved around a lot, you absolutely must use durable, tear-resistant labels. This small upgrade from paper to a synthetic material is the single most important decision you can make for label longevity.
A label is only as good as its ability to stay put and stay clear. Investing a little more in synthetic label stock will save you hours of relabeling frustration down the road.
Matching Adhesives to Your Needs
The label material is only half the battle; the adhesive that sticks it to the bin is just as critical. Adhesives come in two primary types, each serving a distinct purpose.
- Permanent Adhesives create a powerful, long-lasting bond. Choose this for bins that will be stored for years without changing, like sentimental keepsakes or archived documents. Just know that trying to remove these often damages the label or leaves a sticky residue.
- Removable Adhesives are designed for bins with contents that rotate. Think of a child's clothing bin that gets updated every season or a pantry bin for rotating stock. They peel off cleanly, allowing you to easily update the label without a mess.
Why Your Printing Method Matters
Finally, how you print on the label drastically impacts its durability. Standard inkjet printing can smudge with the slightest bit of moisture. It's just not built for the job.
For maximum resilience, thermal transfer printing is the superior choice. This method uses a heated ribbon to literally bond resin or wax to the label. This creates a print that resists fading, water, and smudging far better than any ink ever could. These are the same principles used for industrial asset tracking, where durability is non-negotiable. You can see how the pros approach this by reading our guide on what is an asset tag.
The demand for industrial-grade labels is exploding because businesses understand the high cost of label failure. The industrial labels market is projected to grow from USD 30.2 billion to USD 51.7 billion by 2034, driven by the need for durable solutions.
Consider this: warehouses that switched from standard paper to polyester thermal-transfer labels saw legibility rates in harsh freezer conditions jump from below 70% to over 95% after just one year. That proves the immense value of choosing the right materials from the start.
Building a Digital Inventory with QR Codes
Physical labels are great for telling you what a bin is supposed to contain, like "Holiday Decor" or "Camping Gear." But they can’t tell you the specifics. They can’t answer the question, “Do I have the green tablecloth in this holiday bin, or is it in the other one?”
This is where a digital inventory completely changes the game. It elevates your system from a simple reference into a powerful, searchable database for your physical stuff. By linking a simple QR code on the outside of a bin to a detailed digital record, you give yourself the ability to see exactly what's inside without ever lifting the lid.
This approach bridges the gap between your physical storage and a smart, digital catalog. Imagine you’re hunting for a specific HDMI cable or that one sentimental ornament from your childhood. Instead of a frustrating search through multiple boxes, you just scan a code with your phone and see a full list, complete with photos.
Starting with Visual Documentation
Before you even think about QR codes, your first move is to take clear photos of your bin’s contents. I know, this sounds a little tedious, but trust me, the payoff is massive. A quick visual reference is almost always faster than reading a long text list.
Just lay the items out on a neutral background, for example a plain floor or a bedsheet, and snap a well-lit photo from above. This one simple action creates an instant visual log that becomes the heart of the digital entry for that specific bin.
The process of creating a durable, scannable label system really comes down to a few key decisions.
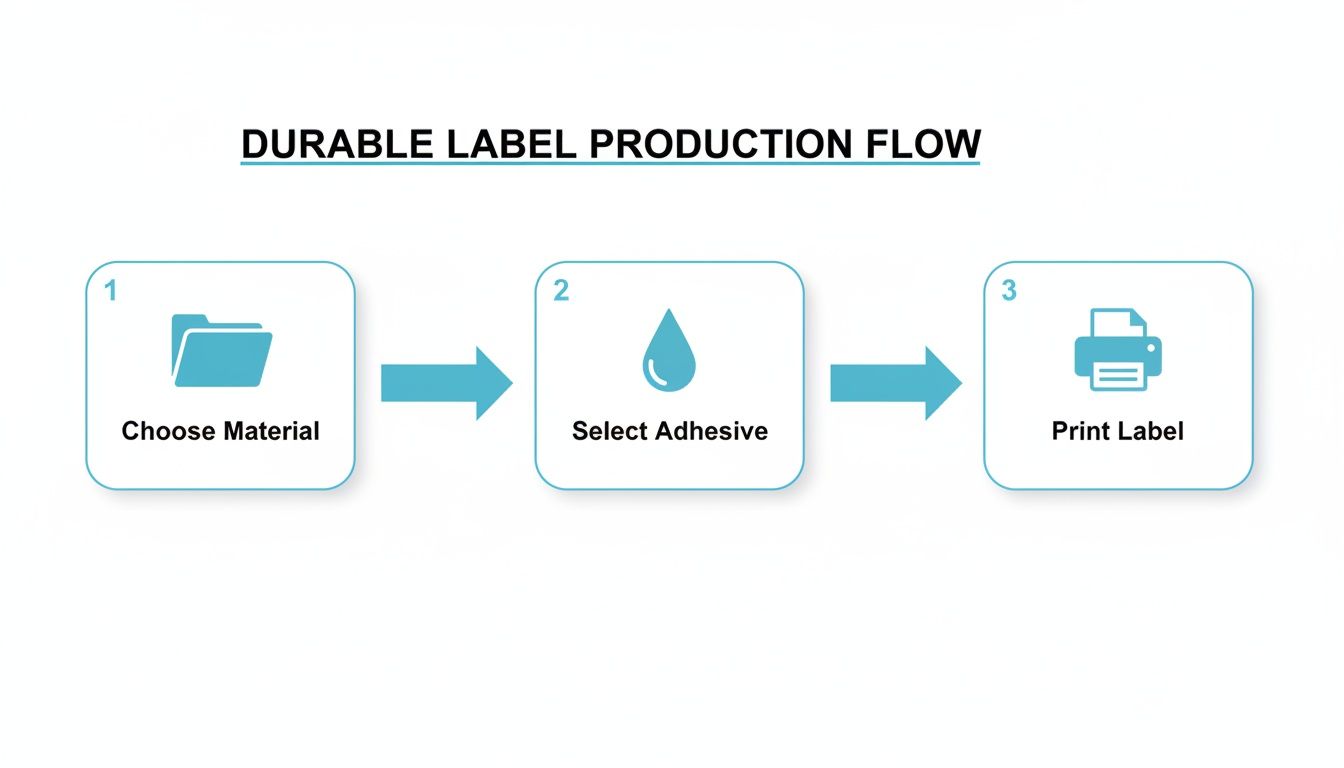
This workflow highlights that picking the right material and adhesive is every bit as important as the final print itself.
Generating and Linking Your QR Codes
Okay, you've got your photos and a mental (or written) list of what's inside. Now it's time to forge the digital link. This is where inventory apps like Vorby step in and make the process incredibly simple.
Inside the app, you’ll create a new entry for your storage bin (e.g., "Attic - Holiday Decor"). From there, you just upload the photo you took and type out the list of contents. The app then generates a unique QR code tied specifically to that entry. This code is the magic key that connects your physical bin to its digital twin.
If you want to get more advanced, you can explore a full-blown tagging system for inventory that scales from home use all the way up to a small business.
Think of a QR code as a hyperlink for the real world. It transforms a static plastic box into an interactive gateway, providing limitless information with a simple scan.
The real beauty of this method is how dynamic it is. If you add or remove an item, you just update the digital entry in your app. The QR code on the bin stays exactly the same, but the information it points to is always current. No more crossing things out on a paper label.
Printing and Placement for Perfect Scans
The final step is getting those QR codes printed and attached to your bins. For maximum durability, print them on the same synthetic label stock (like vinyl or polyester) you chose for your main labels. This ensures the code itself won’t fade, smudge, or peel off after a season in a hot attic or damp basement.
Proper placement is also crucial for a frustration-free experience.
- Be Consistent: Always place the QR code in the same spot on every bin; the top-right corner is a popular choice. This builds muscle memory, so you automatically know where to point your phone's camera.
- Keep It Flat: Apply the label to a smooth, flat surface. Any wrinkles, bubbles, or curves can distort the code and make it a real pain for your phone’s camera to read accurately.
- Size It Right: A QR code that’s roughly 1.5 to 2 inches square is the sweet spot. It's large enough to scan easily from a comfortable distance without looking huge and obnoxious on the bin.
By combining clear photos with unique QR codes managed by an inventory app, you build a system that is not just organized, but intelligent and incredibly easy to search.
How a Smart Labeling System Simplifies Your Life
So, you’ve got durable labels and a digital inventory. What’s the real payoff? The true value of a smart labeling system isn't just about tidy shelves; it's about reclaiming your time and getting rid of the frustration of searching for things you know you own but just can't find. It's the practical, everyday peace of mind that comes from knowing exactly where everything is.
This whole approach transforms your storage from a passive collection of boxes into an active, searchable database. It brings a new level of efficiency to countless real-world scenarios, from minor daily tasks to major life events.
Find Anything Instantly Without the Hunt
Think about the frantic search for holiday decorations. Instead of tearing open four different bins vaguely labeled "Holiday" to find the tree stand, you just search your inventory app for "tree stand." The app instantly tells you it’s in "Garage - Shelf C - Christmas Bin 1," saving you from unpacking and repacking multiple heavy containers.
This same principle applies to everything else:
- Finding a specific tool: Need that plumbing wrench right now? A quick search confirms it’s in the "Basement - Workshop" bin, not lost among the automotive tools.
- Locating sentimental items: When you want to find your child's first-grade art project, you can pinpoint its exact location without rummaging through years of keepsakes.
- Prepping for a trip: Wondering where the travel adapters are? Your app reminds you they're in the "Closet - Luggage" bin before you even start packing.
A smart inventory system fundamentally changes your relationship with your belongings. It moves the burden of remembering from your brain to your phone, giving you instant access and control over your physical world.
This system is the best way to label storage bins because it solves the core problem, not just the surface one. It’s not about knowing what category a bin belongs to; it’s about knowing the specific contents with absolute certainty.
Simplify Collaboration and Shared Spaces
This method truly shines when you're managing items with other people. Whether it's a family home, a shared workspace, or a move, shared access to a digital inventory eliminates all the guesswork and miscommunication.
Imagine a family member needs to find the extra blankets for a guest. Instead of calling or texting you, they can just access the shared inventory, see the blankets are in "Hall Closet - Top Shelf," and grab them on their own. The system also ensures they know exactly where to put them back, keeping your hard-won organization intact.
For bigger projects like moving, this is a total game-changer. Labeling each box with a QR code linked to its contents means movers can place boxes in the correct rooms. Better yet, you can find essentials like coffee mugs or toiletries on day one without opening 20 boxes all marked "Kitchen." It brings a sense of calm and order to what is usually a chaotic process.
Advanced Labeling for Business and Large-Scale Needs
When you’re leveling up from organizing a home garage to running a business with actual inventory, the game changes. The basic rules of good labeling still apply, but the scale and the stakes are exponentially higher. A simple handwritten label just won’t cut it when speed and accuracy are tied directly to your bottom line.
For any commercial operation, the best way to label storage bins is to ditch the manual methods and embrace a robust, data-driven system built for high-volume work. This means moving to a barcode-driven workflow that plugs directly into a Warehouse Management System (WMS). It’s a move that transforms inventory management from a guessing game into a precise, automated science.
Making this shift is no longer optional; it's essential for surviving the intense demands of modern logistics and e-commerce. A single scan of a barcode can instantly update your inventory levels, verify that a worker is picking the correct item, and even guide them to their next location. The impact is immediate, a dramatic reduction in human error and a massive boost in productivity.
Integrating Barcodes and WMS
At the heart of any professional-grade labeling system is the marriage between barcodes and a WMS. Think of the WMS as the central brain of your entire operation, it knows everything about every single item, including its quantity and exact location. The barcode on the bin is simply the key that unlocks all that information in a fraction of a second.
When an employee scans a bin, the WMS instantly gets to work:
- Verifies the Correct Item: It confirms the employee has the right product for the right order, eliminating costly picking errors.
- Updates Inventory in Real-Time: As items are picked or restocked, the system automatically adjusts the stock counts. No more manual entry, no more guesswork.
- Optimizes Picking Routes: The software can map out the most efficient path for workers to take through the warehouse, saving precious time on every order.
This creates a powerful feedback loop that catches mistakes before they happen and maximizes the number of orders you can push out the door. For businesses with specific needs, options like custom product labels for brandingtd.co.uk/stickers/product-labels-gloss-or-matte-custom-labels-for-packaging-branding/) can be tailored to your exact operational requirements.
The Impact on Accuracy and Speed
The global label market, currently valued at around USD 47 billion, is on track to hit USD 61.5 billion by 2030. What's driving this growth? The explosive expansion of e-commerce and logistics, where data-rich labels are the lifeblood of the industry.
With global parcel shipments expected to reach a staggering 29 billion by 2029, warehouses are under immense pressure to scale both their picking accuracy and speed. The only way to keep up is by moving to a barcode system. In fact, studies show it can slash pick errors by 20–60% and improve cycle times by 15–35%. You can dig into detailed industry reports to see more data on just how critical these trends are.
For any high-volume operation, moving from manual to machine-readable labels isn’t just an upgrade; it’s a fundamental shift necessary for survival and growth in a competitive market.
Ultimately, adopting durable, printed barcode labels integrated with a WMS is the most effective strategy for any serious business. It directly addresses the core challenges of speed and accuracy, providing a scalable solution that drives serious productivity gains and ensures your operation can handle whatever demand comes its way.
Common Questions About Labeling Storage Bins
Even with the best game plan, a few questions always pop up when you're in the middle of a big organization project. Getting these little details right is what separates a system that works from a system that lasts. Let's clear up some of the most common sticking points I hear about all the time.
What Is the Best Label Maker for Storage Bins?
If you want labels that will still be readable five years from now, you need a thermal transfer label maker. These aren't your old-school embossers; they print on super-durable synthetic materials like polyester or vinyl, creating a label that won’t fade, smudge, or give up.
Make sure you get a model from a solid brand like Brother or DYMO that connects to your computer or a smartphone app. That connectivity is non-negotiable. It’s the only way you’ll be able to design and print the QR codes that are the brains of your new digital inventory. A basic, standalone label maker just can't do it.
How Do I Make My Bin Labels Waterproof?
Making a label waterproof comes down to choosing the right materials from the very beginning. Forget paper, it's your worst enemy in any area with even a hint of dampness. It will turn to mush.
Instead, it’s a simple two-part formula:
- Start with synthetic label stock. Think vinyl or polyester, materials that couldn’t care less about moisture.
- Pair it with a thermal transfer printer using a resin ribbon. This process literally bonds the "ink" to the label's surface, creating a finish that shrugs off water and even chemicals.
If your bins live somewhere truly hostile, like a basement that occasionally gets damp, you can go one step further. Slap a piece of clear, waterproof packing tape over the entire label. Just make sure you seal down all the edges nice and tight.
Should I Put the Label on the Bin or the Lid?
This is one of those rules you just don’t break: Always, always label the bin itself, never the lid.
It seems like a small thing, but lids get swapped. It's inevitable. Someone is in a hurry, grabs the wrong lid, and suddenly your whole system is compromised. You'll waste time opening the "Holiday Decor" bin only to find it's full of camping gear.
For maximum convenience, stick a label on at least two sides of the bin, usually the front and one of the shorter sides. That way, you can see what’s inside no matter how it’s shoved onto the shelf. Problem solved.
Is It Okay to Just Handwrite My Labels?
Grabbing a Sharpie is tempting because it feels fast, but it’s a shortcut that will cost you later. Handwritten ink fades, especially with any exposure to sunlight or moisture. Plus, let's be honest, your handwriting might not be as clear to your spouse or kids as it is to you.
The biggest drawback, though, is what a handwritten label can't do: it can't hold a scannable QR code. A printed label gives you better legibility and way more durability, but most importantly, it's the gateway to creating that powerful, interactive digital inventory that makes a modern organization system actually work.
Ready to build a smart, searchable inventory for everything you own? Vorby uses QR codes and a powerful app to help you find anything in seconds. Start your free trial and transform your storage at https://vorby.com.