Picking the right barcode scanner for inventory management really comes down to one thing: matching the tool to your specific situation. For a modern home inventory system, you'll absolutely want a 2D imager. This lets you read both the standard barcodes on products and the custom QR codes you'll create for storage bins. Pair that with Bluetooth, and you've got the freedom to scan anything, anywhere in your house.
How to Choose the Right Barcode Scanner
This is the first real step toward getting your home truly organized. The market is flooded with options, but don't worry, you don't need some industrial-grade beast to tame your household clutter. The real goal is to find a tool that makes your life easier, not more complicated. Focus on compatibility with your devices, ease of use, and the types of codes you plan to scan.
The growing need for tools like this isn't just a hunch. The global barcode scanner market is expected to balloon from USD 8.4 billion in 2025 to a staggering USD 15.8 billion by 2035. It’s a clear sign that people everywhere are moving toward smarter, faster ways to track their stuff, both at work and at home.
Key Scanner Types For Home Use
For home inventory projects, scanners basically fall into a few practical categories. Knowing the difference will help you get exactly what you need without paying for features you'll never touch.
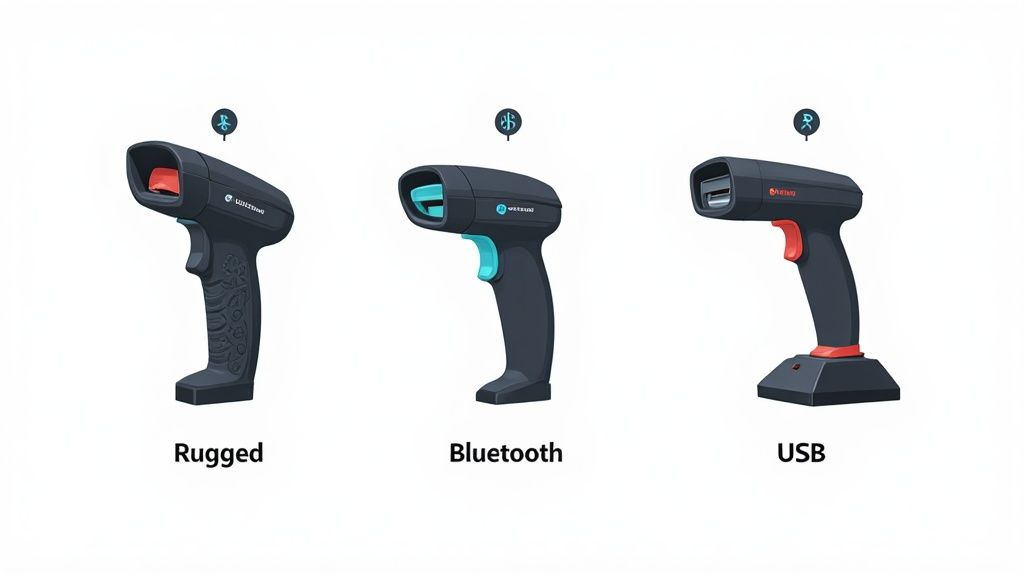
- 2D Imagers: This is the most versatile and, frankly, the only type you should seriously consider. They read the traditional 1D barcodes you see on a cereal box and 2D codes like QR codes. Since a huge part of your system will involve making your own QR labels for bins and boxes, a 2D scanner is non-negotiable.
- Bluetooth Scanners: These wireless wonders give you total freedom. You can be up in the attic or deep in the garage, scanning items and sending the data straight to your phone or tablet without being chained to a computer. The convenience is a game-changer.
- USB Scanners: These are your simple, reliable, plug-and-play options. They're often more affordable and are a great choice if you plan on doing most of your scanning at a desk, right next to your computer.
Pro Tip: If you take away one thing, make it this: prioritize a 2D scanner. The ability to create and read your own information-packed QR codes for storage boxes is the cornerstone of a truly powerful home inventory system.
Barcode Scanner Feature Comparison for Home Use
To make the choice even clearer, here’s a quick breakdown of how these scanner types stack up for typical home inventory tasks.
| Scanner Type | Best For | Connectivity | Pros | Cons |
|---|---|---|---|---|
| 2D Imager | Versatility; scanning both retail barcodes and custom QR codes for bins. | USB, Bluetooth, or both | Reads everything you need for a robust home system. Future-proof. | Can be slightly more expensive than 1D-only models. |
| Bluetooth Scanner | Mobility; scanning items in different rooms, the garage, or attic. | Wireless (Bluetooth) | Unrestricted movement. Pairs easily with phones/tablets. | Requires charging. Can be more expensive than wired options. |
| USB Scanner | Stationary scanning; a dedicated desk setup for entering new items. | Wired (USB) | Simple plug-and-play setup. Very reliable connection. No battery concerns. | Limited range. Not practical for moving around the house. |
This table should help you pinpoint which combination of features best fits how you plan to tackle your inventory project. For most people, a 2D Bluetooth scanner hits the sweet spot.
Features That Truly Matter
Beyond the basic type, a few other features can make a big difference in your day-to-day use. Think about your environment. If you're organizing a workshop or garage, a more durable, rugged scanner might be a wise investment. For cataloging a pantry or closet, a sleek, compact model will do just fine. And if you go wireless, pay attention to the battery life; you want something that can last through a full organizing session without dying on you.
Ultimately, the right hardware is only half the battle. Your scanner needs to play nicely with powerful software to bring your system to life. You can learn more about this crucial connection in our guide on barcoding software for inventory management. To really get the most out of your new setup, it helps to understand the bigger picture of inventory strategy, and this comprehensive guide to inventory management for small businesses has some great insights that apply just as well to the home.
Connecting Your Scanner to Inventory Apps Like Vorby
You've picked out the perfect scanner. Now for the fun part: connecting it to your inventory app and actually starting to catalog your stuff. This is the last little hurdle before the magic begins, and thankfully, it's usually a breeze. Whether you went with a wireless Bluetooth model or a simple USB scanner, you'll be up and running in minutes.
The whole goal here is to get the scanner to talk to your app like it's a keyboard. When you scan a barcode, the numbers should pop right into the app's search bar or item field, just as if you’d typed them in yourself. This universal mode is known as Human Interface Device (HID) or sometimes "Keyboard Wedge" mode, and it’s the default for nearly every modern scanner on the market.
Setting Up the Connection
Getting your device hooked up is typically a simple plug-in or pairing process. The exact steps depend on which type of scanner you chose.
- For USB Scanners: This is the definition of plug-and-play. Just plug the scanner's USB cable into an open port on your computer. Your machine should instantly recognize it as an input device, so no special drivers or software are needed. You're done.
- For Bluetooth Scanners: This is just like pairing headphones. First, get your scanner into pairing mode. This usually means holding down a button or, more likely, scanning a specific "pairing" barcode in the user manual. Then, just open the Bluetooth settings on your phone, tablet, or computer, find the scanner in the list of available devices, and tap to connect.
Once it's connected, open up your inventory app, like Vorby, and tap into any text field. Scan a product barcode. If you see the numbers appear on the screen, congratulations, you're officially ready to scan.
A common hiccup I see is the scanner being in the wrong mode. If your scans aren't showing up, dig out that user manual, find the "HID Mode" or "Keyboard Mode" setup barcode, and scan it. This one action solves the vast majority of initial connection problems.
Configuring Your Scanner in the App
With the basic connection sorted, a few tiny tweaks can make your workflow ridiculously smooth. Most inventory apps don't need a lot of complicated setup, but there are a couple of key settings worth checking.
The most important one is the "carriage return" or "enter after scan" function. By default, some scanners just input the barcode number and stop. Enabling the carriage return feature automatically "hits enter" for you after each scan, saving you an extra click or tap every single time. That small change adds up to massive time savings when you're scanning a whole room or a bunch of boxes.
You can usually turn this on by scanning another configuration barcode in your scanner’s manual. It’s a perfect example of how your hardware and a powerful inventory tracker app can work in concert to build a truly efficient system.
Building an Efficient Scanning Workflow
Look, a powerful barcode scanner is a great start, but it's just a tool. The real magic happens when you pair that tool with a smart, systematic process. That’s what transforms the chore of cataloging all your stuff from a mountain of a project into a series of small, manageable wins.
The key is finding a rhythm that actually fits your life.
This might mean you’re the type to block out a whole weekend for a full-on, room-by-room audit. Or, maybe you’re more of a "scan-as-you-go" person. For instance, when you get home with groceries, just take two extra minutes to scan items as you put them in the pantry. It’s a tiny habit that keeps your food inventory perfectly up to date with almost zero extra effort.
Getting the hardware connected is the easy part. It’s usually a simple three-step dance.
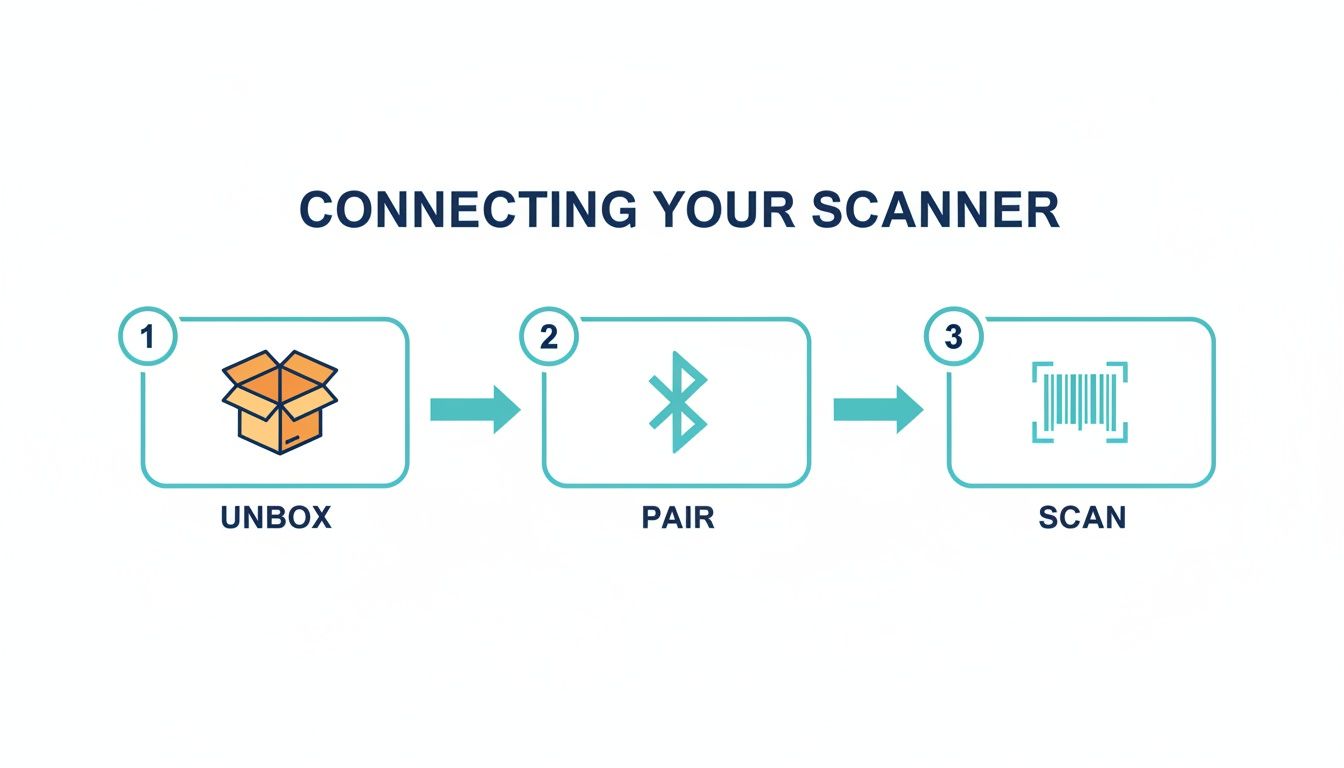
As you can see, you'll be up and running in minutes, moving from unboxing to scanning faster than you can make a cup of coffee.
Strategic Scanning Methods
There’s no single "right" way to tackle your inventory, so pick a method that won't make you want to quit before you even start. A structured approach is your best defense against burnout.
- The Room-by-Room Audit: This is for the deep divers. Pick one room (the garage and the kitchen are always great, chaotic places to start) and commit to scanning everything in it. As you scan, immediately assign the item its location right in the app, like ‘Garage Shelving Unit 2’ or ‘Kitchen Pantry - Top Shelf’.
- The Box-by-Box Blitz: Absolutely perfect for attics, basements, and closets full of storage bins. Grab one bin, scan every single item inside, and then assign all of them to that specific box. For example, zap your tent, sleeping bags, and camp stove, and assign them all to ‘Camping Bin 1’. Done.
- The Daily Habit: This is less about a massive initial project and more about ongoing maintenance. I like to keep a scanner on the kitchen counter. When you use the last of the olive oil or bring home a new tool, scan it right then and there.
Your inventory system is only as good as the data you put into it. The secret isn't one giant, heroic organizing session; it's building small, consistent habits that keep your digital inventory reflecting your physical reality.
Organizing as You Scan
Here’s where the real power of a dedicated scanner kicks in: organizing items digitally the moment you scan them.
This habit of immediate categorization saves you from the future headache of sorting through a massive, disorganized list of "stuff." It instantly connects an object to its purpose and its place in your home.
Think about it this way: when you’re scanning a box of holiday decorations, don't just add "decorations" to your inventory. That’s too generic. Instead, create a location like ‘Attic Storage’ and maybe a tag or collection called ‘Christmas Decor’.
By assigning the item to both as you scan, you give yourself multiple ways to find it later. You could search for "everything in the attic" or "all my Christmas stuff" and get the right answer instantly. This is the kind of detail that makes a home inventory system genuinely, life-changingly useful.
Creating a Smart Labeling Strategy
While plenty of things you buy come with a standard barcode, the real magic of a home inventory system happens when you start labeling the items that don't. I'm talking about your storage bins, personal collections, or even individual tools. This is where a custom labeling strategy, built around the incredible flexibility of QR codes, turns a good system into an absolutely indispensable one.
Unlike a traditional barcode, a QR code can hold a huge amount of information. You're not just stuck with a product number; you can pack in detailed descriptions, purchase dates, or notes about where something belongs. This simple shift transforms your barcode scanner for inventory management from a basic lookup tool into an information powerhouse.
This idea of standardized, scannable data isn't some futuristic concept; it’s the backbone of modern logistics. In fact, by 2025, an estimated 90% of major global retailers were using barcodes to run their inventory systems. That near-universal adoption just proves how powerful a simple scan can be. You can take a closer look at these trends in recent barcode adoption statistics.
Designing Labels That Last
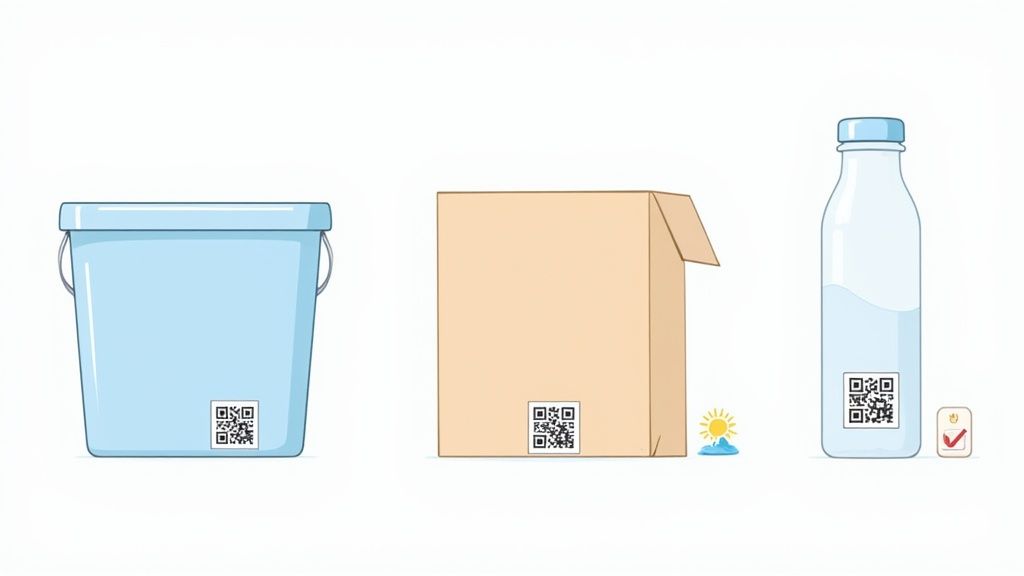
Let's be honest: the best label is one you can actually scan when you need it. Creating durable, easy-to-read labels is crucial, whether you’re sticking them on plastic totes in a damp basement or cardboard boxes in a dusty attic.
- Choose the Right Material: Standard paper labels are a recipe for frustration because they'll fade, peel, or turn to mush. For items in storage, it's worth investing in weatherproof polyester or durable vinyl label sheets. Understanding label durability is a key part of the process; you can learn more about the lifespan of removable and dissolvable labels.
- Print with High Contrast: A crisp black-on-white QR code is your scanner's best friend. I'd steer clear of using light colors or printing on busy patterns that could easily confuse the scanner's lens.
- Place Labels Strategically: Always stick labels on a flat, clean surface where they're easy to see and scan. For storage bins, a great spot is on the front and the top. That way, you can identify the contents whether the bin is stacked on the floor or sitting on a high shelf.
Advanced Labeling Techniques
Once you get the hang of creating basic labels, you can start exploring more advanced methods to make your inventory even smarter. The goal here is to get the most information with the least amount of effort.
The Box Manifest Method: Instead of labeling every single item inside a storage bin, just create a single QR code for the box itself. Link that one code to a detailed digital list of its contents within your inventory app. A quick scan of the box tells you everything inside without you ever having to open the lid.
This approach is an absolute game-changer for seasonal items or anything in long-term storage. Imagine scanning a box labeled "Holiday Decor" and instantly seeing a list pop up: "three strings of lights, one tree stand, four boxes of ornaments." It's a simple technique that saves an incredible amount of time and hassle.
To dive deeper into organizing items this way, check out our guide on creating an effective tagging system for your inventory.
How to Troubleshoot Common Scanning Issues
Even with the perfect scanner and a great workflow, you’re going to hit a technical snag eventually. It’s totally normal. The real trick is knowing how to fix these little hiccups quickly so you can get back to organizing without losing your rhythm.
Most problems you'll run into with your barcode scanner for inventory management are, thankfully, pretty easy to solve. It’s usually something simple: a flaky connection, a poor-quality label, or a minor scanner setting that just needs a quick tweak. Let’s walk through the usual suspects and how to sort them out.
Scanner Connectivity Problems
One of the most common frustrations is when your scanner just won't connect or keeps dropping its connection. Before you start thinking the hardware is busted, run through these quick checks.
- Check the Battery: I know it sounds obvious, but a low battery is the number one reason Bluetooth scanners get flaky. Performance gets weak, connections drop, and all sorts of weird issues pop up. A full charge often fixes things that seem much more complicated.
- Re-Pair the Connection: For Bluetooth scanners, sometimes the connection just gets corrupted. Go into your phone or computer's settings, find the scanner, and tell your device to "forget" it. Then, pair it again like it's brand new. This clears out any bad data causing a conflict.
- Confirm HID Mode: Make sure your scanner is set to HID (Human Interface Device) mode. This is the universal "keyboard" mode that most apps expect. Your scanner’s manual will have a specific barcode you can scan to reset it to HID, which solves a ton of communication errors.
Never underestimate the power of a simple reboot. Turning both your scanner and your phone off and on again can fix a surprising number of pairing issues by clearing out temporary glitches in their memory.
Dealing with Unscannable or Faulty Labels
Sometimes the problem isn’t the scanner; it's the barcode or QR code itself. A scanner needs a clean, high-contrast image to get a good read. If you’re struggling to get a scan, take a close look at the label.
A few things can make a label tough to scan:
- Low Contrast: A light gray QR code printed on a white background might look slick, but to a scanner, it can be nearly invisible. You always want crisp, dark black printing on a plain, light-colored background.
- Poor Print Quality: Smudged ink, fuzzy lines from a cheap printer, or just printing the code too small can all cause scan failures. Try reprinting the label at a higher quality setting and maybe a slightly larger size.
- Damaged or Obstructed Labels: Wrinkles, tears, or even a layer of glossy packing tape over a label can create glare that distorts the code just enough to make it unreadable.
Correcting Scanning Errors
What if the scan works, but the data that shows up is wrong? This is almost always a scanner configuration issue, not a problem with the app you're using.
For instance, a classic issue is getting duplicate entries from a single scan. This usually happens because the scanner is programmed to send both the barcode number and an extra "enter" or "tab" command right after it. Dig out that little manual that came with your scanner and look for the configuration barcodes. Scanning the one for "Remove Suffix" or "Disable Carriage Return" almost always fixes this instantly.
It’s clear there’s a growing demand for hardware that just works. The store barcode reader market alone is expected to hit USD 2.5 billion in 2025. That's growing even faster than the broader barcode market, which tells you people are serious about finding dependable scanning tech. You can discover more insights about the barcode reader market growth to see where things are headed.
A Few Final Questions
Even with a step-by-step guide, a few questions always pop up when you're about to start a new project. Let's tackle some of the most common ones we hear about using a barcode scanner for inventory management at home.
Do I Really Need an Expensive Scanner for Home Use?
Absolutely not. It's easy to see the heavy-duty scanners used in warehouses and assume you need something similar, but that's total overkill for home use. Honestly, for most people, a simple 2D scanner that can read both traditional barcodes and QR codes is all you'll ever need.
Focus on the features that matter for home life, like Bluetooth connectivity so you can easily pair it with your phone or tablet. You can find plenty of reliable, rock-solid options for under fifty bucks that will handle every task you throw at it. The goal here is value and convenience, not a hefty price tag.
Can My Whole Family Use This System?
Yes, and you absolutely should! A home inventory system works best when it's a team sport. When everyone is involved, the data stays fresh and accurate without feeling like a chore for one person.
Apps like Vorby are built for this kind of collaboration, letting you grant access to other family members right from your phone. They can scan items as they get used, moved, or added to the house. The real secret is turning it into a simple household habit. Make a simple rule: whoever takes the last box of pasta from the pantry scans it out. That small, shared effort makes the whole system practically run itself.
What's the Real Difference Between 1D and 2D Scanners?
This is a great question, and the answer is critical for building a smart, modern home inventory.
- 1D Scanners read the classic, old-school linear barcodes, which you can think of as the UPC codes on groceries. They're just a series of vertical lines.
- 2D Scanners can read those same 1D barcodes plus the more complex, two-dimensional codes like the QR codes you see everywhere now.
For a flexible home inventory where you'll be creating your own QR labels for storage bins, moving boxes, and random items that don't have a barcode, a 2D scanner is the only practical choice. It gives you the freedom to label anything, which is the whole point of a truly useful system.
How Do I Keep My Inventory from Getting Out of Date?
Consistency is everything. The trick is to stop thinking of it as a separate chore and start building it into your normal routines. The best systems are the ones that fade into the background.
Keep your scanner somewhere visible and high-traffic, like on the kitchen counter or a shelf by the garage door. That visual cue is a powerful reminder. Then, just make it a habit. When you finish a bottle of olive oil, give it a quick scan before you toss it. When you bring home a new power tool and put it away, scan it in right then and there. These tiny, frequent updates are so much easier than trying to do a massive, painful re-inventory once a year.
Ready to stop searching and start finding? Vorby uses powerful AI and smart scanning to help you catalog everything you own, so you always know where your items are. Get started with your free trial today!